By applying the fundamentals of website optimisation you can boost your search engine ranking efforts and get yourself on Google’s radar. Here’s our handy guide to honing your first website and achieving better all-round SEO.
Contents
What is Website Optimisation?
Website optimisation is the continual process of making sure that your website is as perfect, functional and effective as possible at all times. Your website serves not just to help you achieve your business goals, but also to deliver a great user experience. Website optimisation is an ongoing exercise that covers a variety of aspects including the speed with which your website loads and renders, your SEO campaign strategy, conversion rates, the visual design and usability. Website optimisation encompasses a range of tasks that incrementally bring a site closer to achieving its objectives, whatever they may be!
Website Optimisation for Beginners – A Starter’s Guide
So you’re a small business owner and you’re ready to take your brand into the digital spotlight. Sure, the online business world is growing and it only seems natural that you want your brand to be a part of this growing entity. The question you may ask yourself, however, is where do I start? how do you actually achieve it? What aspects of my website do I have to fine-tune to get it up and searched for in search engines? Truthfully, it takes time, and a lot of it. There’s good news though – it doesn’t mean you can’t set the foundations towards building those steps towards that objective. Anyone getting started online has to start somewhere and setting the first blocks in place will aid you in visualising the end result. Let’s start here.
There is a plethora knowledge out there that promise to help you to optimise your website and rank well in the search engine results page, but what good are they when you don’t have any digital presence to begin with, or the tools to assist you? In this ‘Website Optimisation for Beginners’ guide we’ll help you through the basics and essentials you need to calibrate your website.
Get your Google Account Up and Running

The benefits of having a Google account comes in endless forms. It grants you access to a number of constructive tools including Google Adwords, Google Analytics, Webmaster Tools (Google Search Console), and Google Adsense; all of which are beneficial for your business. These tools will provide you with essential data, including the ability to monitor traffic going to your website, which is paramount. Grabbing yourself a Google account is a first step into gaining access to the multitude of priceless tools. We recommend this, your website will thank you for it.
Show me how!
- Head over to accounts.google.com/signup
- Fill out the required fields.
- Click on ’Next step’ to proceed.
- Enter your confirmation method.
- Success!
Discover Gaps and Opportunities with Google Analytics
Google Analytics is a free web analytics platform created by Google to help users in identifying useful metrics for their website. As one of the most popular and used platform of its kind, it provides helpful statistics, great for small businesses who are starting out and want to understand how visitors are finding you amongst the abyss of the internet.
It covers an array of aspects including, but not limited to, how visitors found you, from which search engines, your landing page performance, traffic sources, and from which social media platform. It’s handy to know that you’re able to integrate Google Analytics with your WordPress account with a plugin (providing you have WordPress’ Business plan). It’s definitely worth signing up a free account otherwise you may be missing out on some valuable opportunities.
Create a Favicon and Get Your Website Recognised
In some browser tabs, particularly on popular websites, you may have noticed a tiny image next to it. Favicons are a graphical representation of your site. These are useful for helping visitors in identifying your site and differentiating you from other brands.

Although it may not seem much but a little sure goes a long way, particularly when it comes to seriously optimising your website from a branding point-of-view. Consider using this to help support your online branding efforts as it has a more significant role other than just being a nifty little picture on your webpage. The recommended size for your favicon is 512×512 pixels. If you’re great with image-editing software, then you’ll have no problem in cutting down your images to the recommended proportions, if not then you can find tools online to help you quickly generate your own favicon. Check out Favic-o-matic or Favicon-Generator for those who aren’t so digitally savvy.
Adding Your Own Favicon to WordPress
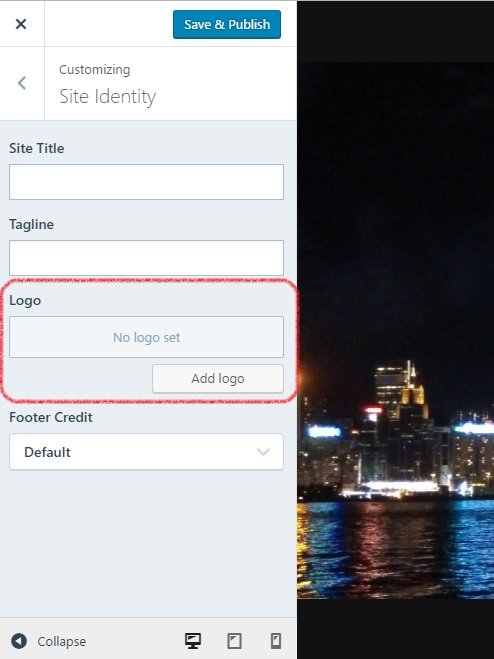
- Head over to your WordPress account
- On the left side bar, click Appearance > Customize
- On the left, select Site Identity
- Click Add Logo and upload your image
- Voila!
Optimise Your Page Load Speed to Minimise Bounce Rates
Page load speed (or page load time) is an important factor that can affect whether or not a visitor decides to stay on your website. Whether they are aware of it or not, the majority of visitors expect a webpage to load within 2 seconds, and may discard it completely if it isn’t fully loaded within 3. Visitors are often in a hurry to seek the information they want and they usually want it as quickly as possible. A page that loads faster is always considered good news; it provides your readers with a better experience and gives them what they’re looking for fast. You will want to keep your bounce rates to a minimum (the time it takes for someone to return to the search results after clicking on your site) as search engines take this into account when determining your site’s value.
Thankfully, there are various methods you can consider when cutting down your load time, but here is the most common method we recommend.
Trim the Fat Off Those Images

You may or may not know, but the size of your images can make the difference between your website loading like a slug or a speed demon. To increase your page load time, it’s important to keep your image sizes are tiny as possible. There’s a wealth of free image compressors available for you to use including Optimizilla and Compressor.io. Optimizilla is a great one to use as it provides you with a side-by-side comparison between the original image and the modified. It also has a convenient slider to adjust the quality to your liking in real-time. Handy.
Free Tools to Test Your Page Load Speed
So, how can you test the page load speed of your website? There are also many tools available online which will allow you to test your site speed, including Google’s PageSpeed Insights and Pingdom.
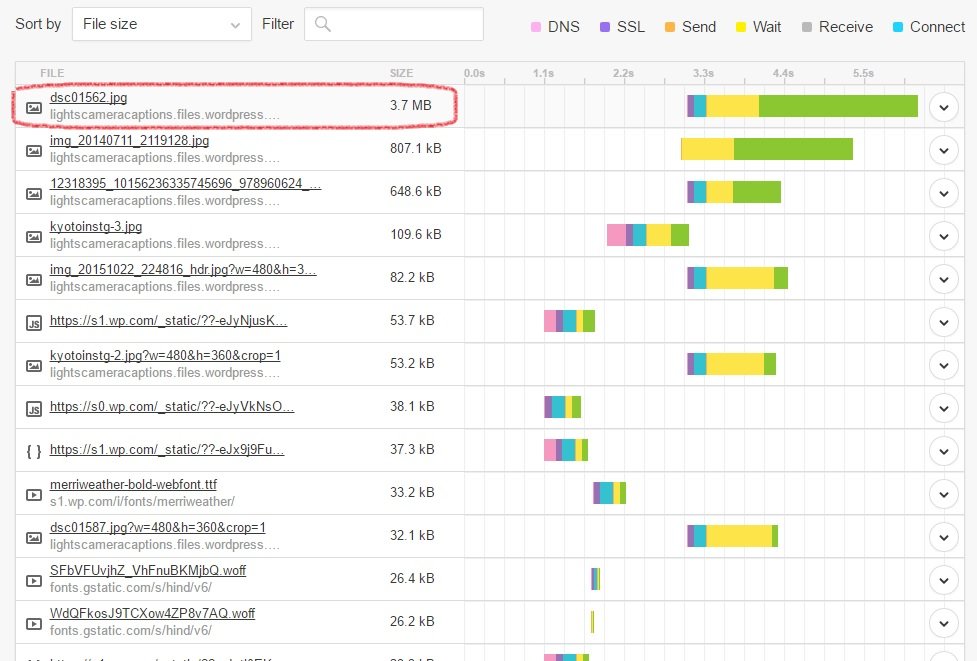
Pingdom is a great tool which displays all the images on a page and allows you to drill down into individual images and elements. Its quickly identifies which images are bringing down your page loading speed and where you can correct them. Find out which components are bringing down the party and throw them out (or at least shrink them down).
Grab an SEO Plugin For Your Website

Search engines undoubtedly bring colossal sources of traffic to your website and SEO plugins can be beneficial for your website optimisation efforts. Plugins like Yoast for WordPress will notify you of changes that can be made to your content and bring it to an up to an optimal level. From meta descriptions to focus keywords, this plugin guides you in sculpting your articles to a standard which Google’s search engine will give two thumbs-up to.
How To Setup Yoast SEO
- Head over to your WordPress admin panel.
- Find the ‘Plugins’ tab on the left and click ’Add New’.
- With the search box, look for Yoast SEO
- Find the ‘Install now’ button.
- Activate the plugin and you’re good to go.
Make your URLs User and Search Engine-Friendly
Creating friendly URLs for your website can provide a lot of advantages when it comes to user experiences and website rankings. When it comes to creating your URL, do ensure that your URLs look clean and straightforward as possible.
For example:
It’s much better to have something that says:
www.example.com/category/best-selling-computers
as opposed to:
www.example.com/?p=463654
Doesn’t look so appealing, right? Having a static URL (former example) as opposed a dynamic URL (latter) does provide some SEO value for your website. Static URLs are much more user-friendly (and nicer to look at) and having the keyword within will help visitors and search engines to better understand what it is that they’re reading. Your URLs should always contain keywords within them and should avoid using random, irrelevant number and symbols. Furthermore, if your URL name is a phrase you should opt for using a hyphen (-) to separate each keyword, this is because search engines perceive hyphens as a separator for two words and underscores do not, thus giving them a (minor) ranking benefit.
Get Your Sitemap Up and Running
A sitemap is essentially a table of contents of your website. It allows visitors to navigate your website easily, particularly if your site has a lot of content within it.
It’s also enables search engines’ web crawlers to crawl through your pages more easily and make sense of what they’re about, which is good news for SEO. It’s best to organise your sitemap in a hierarchical order so that it is clear for both visitors and search engines to understand what your site contains.
Creating Your Website’s Sitemap
Your sitemap can be created in various formats, the most popular including XML or text. There are various ways to create a sitemap for your website if you’re confused as to how to go about it. Using third-party tools such as XML Sitemaps Generator can save you much of the headache.

Submitting Your Sitemap to Google
It’s important to submit your sitemap to Google once you’ve created one:
- Head over to Google Search Console and sign in.
- In the sidebar on the left, select Site configuration > Sitemaps
- Select Add/Test Sitemap (upper right hand side)
- A text box will appear. Enter “/system/feeds/sitemap”
- Submit your sitemap
Breadcrumb navigation, or a breadcrumb trail, is a secondary type of navigation that tells a user where they are in a website. This is particularly useful if your website is teeming with pages and categories as it aids a visitor in understanding where they are amongst the vastness of a complex website. Not only does it provide a rope back to safety if you’re lost, it also helps to boost the user’s experience and usability on a website, making it much easier for them to understand your site structure better. Breadcrumb navigation can also help your visitors discover other useful pages or resources you may have on your website which they may not have noticed otherwise.
Here’s what it looks like:

Can you see how convenient it is to navigate around the website? This structure provides your visitors a logical and fluid experience.
There are a number of ways to set up your own breadcrumb navigation, but if you have the Yoast SEO plugin for WordPress this will already have an option to integrate your own.
Optimise Your Internal Links
Internal links on your website are useful for helping your visitors navigate through your website, support an informational hierarchy, and spread ranking power to other pages on your site. Moreover, they help Google’s crawlers (or bots) to trawl through your site more easily, understanding and making sense of what your website contains. After all, if Google can’t decipher what your site is about, how are they going to present it to searchers? And of course, we all want more visitors and traffic to our website.

How to Use Internal Links on WordPress
- Jump onto WordPress
- Open up the post or page you want to edit.
- Scan through the content to find the keywords you feel are thematically related or connected to another piece of content.
- Highlight the keyword or phrase and then click on the chain link icon above (Insert/Edit Link).
- A box will appear. Either enter the URL of the page you want to link, or use the “Link to existing content” below.
- Click Add Link
- Success. You can repeat this as many times as needed. (Ensure you click ‘Update’ before leaving).
Start Socialising with Social Media.
We all know that having a social media presence is crucial for your business. It’s a critical source for driving traffic to your website which in turn will help your website rise up on a search engine’s ranking ladder.
The least you should have are Facebook and Twitter, these are the biggest and most popular social platforms that your customers will likely be using and it’s a great starting point if you’re new to the scene. Using these platforms are great for initiating conversations and building meaningful customer relationships, bringing them back to your website.
Set them up here:
- Head over to Facebook to create your page
- Jump over Twitter to set up a company account
Here are other social media platforms you can utilise for your site and their perks:
LinkedIn.
Advantages: Networking platform for professionals and companies.
Google+
Advantages: Seen as a more professional and formal alternative than Facebook (best if you’ve already begun to gain momentum on other major platform)
Instagram.
Advantages: Great for sharing visual content and short videos
Pinterest.
Advantages: Similar to Instagram.
YouTube.
Advantages: Ability to promote your brand through video content. Beneficial for those who are experts in their field and can provide in-depth explanations (and aren’t camera shy).
Social Media Management Tools to Manage Your Social Platforms
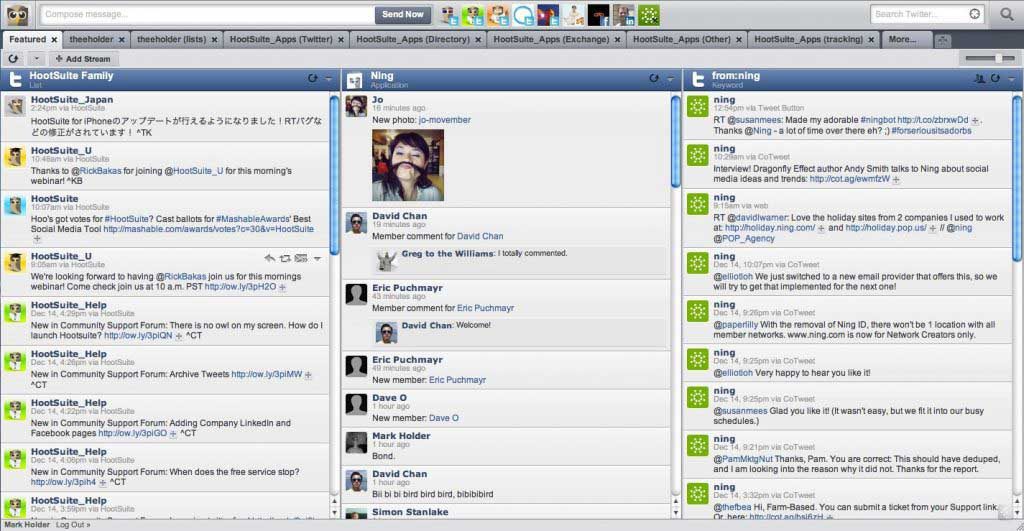
If you were feeling fearless and signed up to every single one of these social accounts then fair enough, nobody is judging. However, having many social media accounts under your control can become increasingly confusing and a nightmare to manage. Fortunately, there are social media management tools to put your mind at ease, including Buffer and Hootsuite. These services help you to keep on top of your social media platforms by integrating them into one convenient, visually-pleasing dashboard. Kind of like killing seven birds with one stone (for lack of a better analogy).
Shorten Those Links Before Posting to Social Media
Take a good hard look at your URL. You may notice that the URL is a tad too long, messy, and unlikely to win any beauty awards any time soon. This is where shortening your URL becomes convenient. Not only do URL shorteners make your links more manageable and easier to share, they’re much more social media friendly particularly on Twitter where every character counts. If you’ve set up a Google Analytics account, then you will eventually want to track your content to see how they are performing. Another advantage of using URL shorteners is the ability to track your where your customers are coming from, when, and a handful of other useful information. Try using Google URL Shortener or Bitly to grab your own.
Search engines have now started to look at social media as a ranking factor in their algorithm. These social signals include how many times your content is liked, shared, and tweeted by eager netizens. Social sharing buttons are also there to encourage a better experience for your visitors which helps them to easily share your content it if provides any value to them. This is incredibly useful in developing valuable, natural links and traffic back to your website. Great, right?
We strongly recommend that you include social sharing buttons in certain areas of your pages. These include the beginning, the side, and then end. This helps to cover as many areas as possible to encourage readers to share your content. There is an extensive list of plugins available on WordPress to satisfy all your social sharing needs. Do check them out to find the one that suits you an your website best.
Summary
So to recap, if your business is new to the online scene and you want to improve your website performance, consider these fundamental steps:
- Get your Google account up and running
- Discover gaps and opportunities with Google Analytics
- Create a favicon and get your website recognised
- Optimise your page load speed to minimise bounce rates
- Grab an SEO plugin for your website
- Make your URLs user and search engine-friendly
- Get your sitemap up and running
- Start using breadcrumb navigation for better UX
- Optimise your internal links
- Start socialising with social media.
- Shorten those links before posting to social media
- Add social sharing buttons to make your content shareable