If you’re looking to sell products online, you may be looking to host your website on an ecommerce platform like Shopify. You may in fact already be doing so!
If you are, then you’ll know that images play a major part in both attracting potential customers’ attention, and giving them crucial information about the product they are buying. With images playing such a big part in such ecommerce sites (arguably a lot more than on others), it’s all the more important to optimise your Shopify images.
Contents
What is Shopify?
Shopify is a computer software platform for online stores and retail point-of-sale systems. As you can imagine, taking payment for goods and services online is very different to accepting cash over the counter. Online shopping sites – or eCommerce sites as they are often referred to – need to offer secure, safe and speedy payment options in order to be successful. Shopify is world-leading in terms of the array of service it offers online vendors. It can help store owners to organise their online inventory, customise the way their storefront looks, accept credit card payments and track and respond to orders, all with just a few clicks of a button.
What is image optimisation?
Essentially, image optimisation is the practice of editing your pictures to make sure they are best fitted for their purpose on your website, so that users will have a better experience of your site, and search engines will rank your page more favourably. We will go through a comprehensive list of steps to optimise your images for shopify below, but some key examples include choosing the right image size and using appropriate alt tags.
Why is optimising your images for Shopify important?
Image optimisation, whether in helping to load your page faster or giving search engines a better idea of what your photo is about, will help boost your overall search engine optimisation. This should not only make for a more user-friendly site, but will better your chances of being shown in search results when people search for products like yours in Search Engines like Google.
Are there any free apps to use with Shopify that will optimise images for me?
Shopify has some free basic tools which can help with the optimisation process, but any other optimisation apps displayed on Shopify (and are not necessarily connected directly to Shopify) need to be paid for.
There are indeed a host of online tools, many of which are free, that can help you optimise your images. However, if you truly want to have control over your image optimisation process and make your images the best possible, it is worth taking the steps to do it yourself, or at least understand the possible steps that can be taken. Below we will go through how to use Shopify and your own tools at hand to optimise your images so they are ready for ecommerce. We’ve listed the steps in the order you would carry them out – the list is targeted towards Shopify users, but most points can also easily apply to general photo optimisation. So, let’s get started!
How to optimise your images for Shopify:
1. Choose the right image file names
In order for search engines to better understand what your images (and by extension, the web page they are on) are about, they will crawl any available text for clues, including the image file names. Because of this, it’s good to rename your image files (i.e. don’t leave them as the default assigned by your camera) so that they accurately describe the product, and also use your keywords.
If you want to go the extra step, you can also look up through your web analytics to see which terms your customers use to search for your products. This will give you an idea of the sorts of specific words and phrases customers are using to find your products, which you can then use in your own image file names.
This is a good step to take not only because it’s useful, but because it’s so easy to carry out. Simply right-click your image file, and select the option to rename it – no software required. You can edit your file names within Shopify (either in their image edit options shown further down, or by going into the HTML reader), but it is probably good practice (and more straight-forward) to rename your images before uploading them.
2. Reduce Your Image File Size
The smaller the size, the quicker the images will be to load, and thus the quicker your overall page speed, which is taken into account by search engines in their ranking of your page. Whilst Shopify automatically compresses images for you, it is still handy to know how to reduce the sizes even further by yourself.
If you don’t have Photoshop, you can get a lot of these similar features through other free online tools, such as GIMP or PicMonkey – they may not have all the features as Photoshop, but are definitely a big step in the right direction when it comes to reducing image file size. As an ideal, it’s good to keep all image files below 100kb. If you have Photoshop, you can do this by using the ‘Save for Web and Devices’ feature, which will give you options to choose between PNG, Jpeg, and Gifs (which we’ll go into further detail about below), and fine tune other specifications such as dithering or quality. We give a full breakdown of how to do this in our step by step guide on Photoshop image optimisation, so do check it out for a better understanding of how this works.
Note: this is not the same as the dimensions of an image, though they are connected. See point 4 ‘resize your image’ for more information.
Alt tags are the alternative text that is displayed when, for whatever reason, a browser cannot display your image file. This is useful for visitors, as they can get an idea of what the image was about. It’s also useful for search engines, as it gives the search engine a better idea what your web page is about.
As with file names, it’s best to choose alt tag text that accurately describes your products, perhaps with a keyword involved (though you should be careful not to overstuff the alt text with too many keywords). Two additional important things to keep in mind for ecommerce are:
- that if your product has a specific model or serial number, this is also worth including in your alt tag text.
- If you have more than one photo of your product (perhaps from different angles), make sure to differentiate each of their alt tags from each other by describing their differences (e.g. difference in angle view).
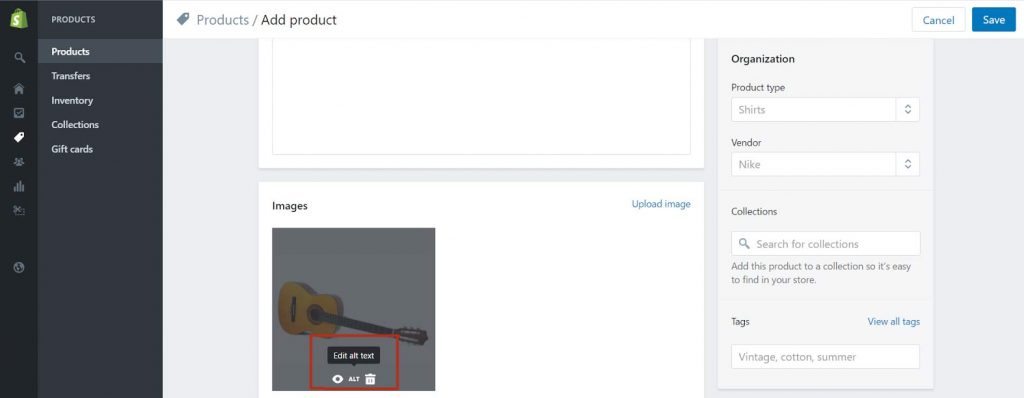
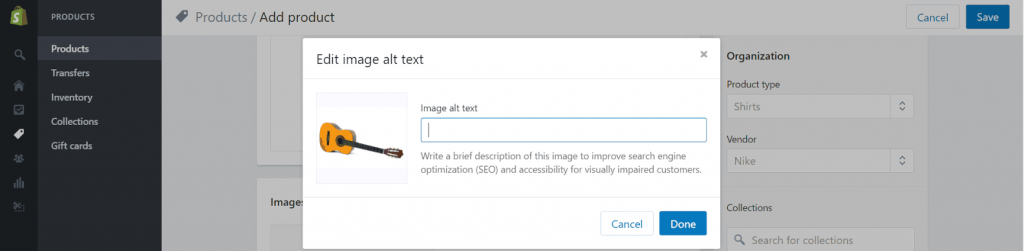
There are a few ways you can add alt tags to an image. The easiest method by far is to upload your image to Shopify, and then select the icon to edit your alt tag. Then you can simply type in the alt tag text you want to use.
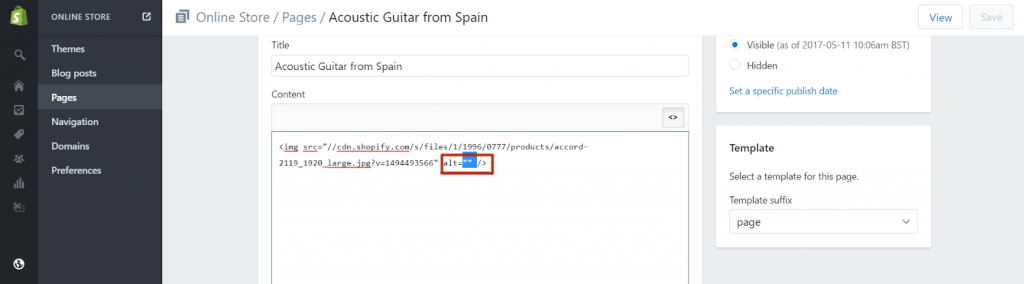
Once this is done, you can check for the alt-text by viewing the page source, and searching for ‘alt=’ in the code. This should then show you the alt text you specified (though you may need to search through a few alt text tags if you have more than one image with alt text on the page).

If for some reason it hasn’t worked, you can open the page with the image in the HTML builder and edit the text directly in the code, as shown below.
4. How to resize images for Shopify
Bigger images are not always necessary for each web page, especially when it comes to ecommerce browsing pages where the images are almost all thumbnail size.

Because of this, it’s worth using physically smaller images (i.e. with smaller dimensions) where possible, as this will in turn reduce the file size and make for quicker image loading. If you don’t, and upload a larger image which you then shrink down by resizing in the code, this not only takes more time for the server to execute, but bloats your code and makes the loading time even longer.
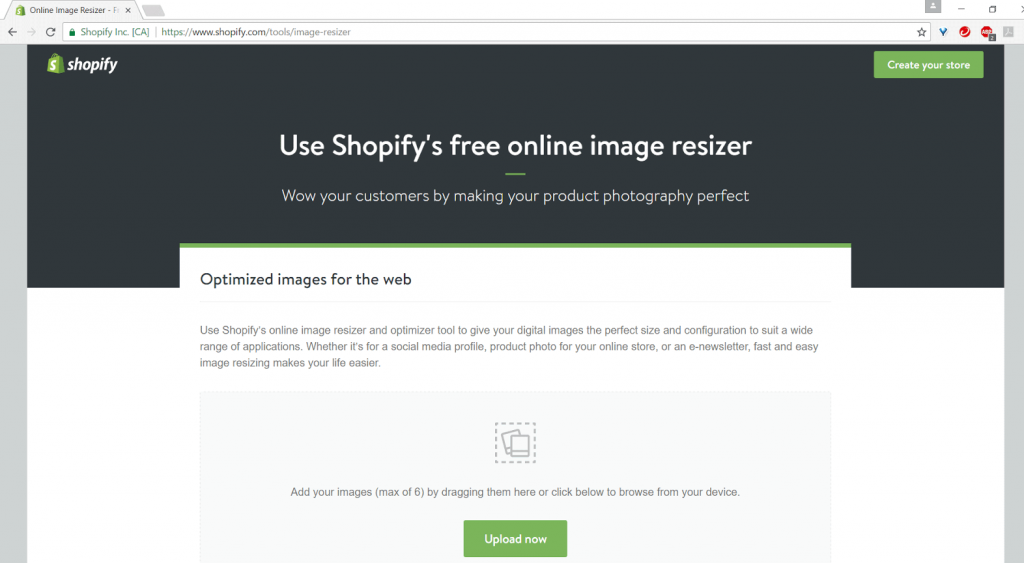
Shopify has both an in-platform and online tool that helps you resize images for free. You simply upload your photo, and select the size you would like to resize to.