
Optimising your images can be really important to speed up your page load speed, especially if you have a web page with lots of images. Photoshop is a great tool when it comes to reducing your image files sizes. Our simple step by step guide will help you optimise images for web.
Note: There are various different facets to image optimisation – if you want a breakdown of everything, check out our full guide to optimising images.
What is image optimisation?
Images are data heavy and can slow down the speed at which your website loads. Optimising those same images will reduce the overall size of your page, which in turn, helps it to load quickly and keeps your visitors happy – ideally you want them to be below 100kb. Most images are captured in very high, print-ready quality, making them large in terms of footprint. Optimising them means that the overall dimensions can be reduced without compromising the quality of the image. To do this you’ll need to look at image file type and quality adjustments. Optimised images are web ready, and compressed to retain their quality without eating great chunks of data. The end result is high quality images, that do not affect the time it takes for the pages on your website to load.
Optimising your images for the web with Photoshop:
1. Open the optimisation panel. Depending on your version of Photoshop, this will be located either under:
- File → Save for Web and Devices
- Or (if you’re on a newer version of Photoshop) File → Export → Save for Web (legacy).

2. Once you’ve opened the panel, make sure to select ‘4-up’ to make sure you have a preview of your image in different formats. This will make it easier for you to compare the original to the different options.
3. Test out different presets.
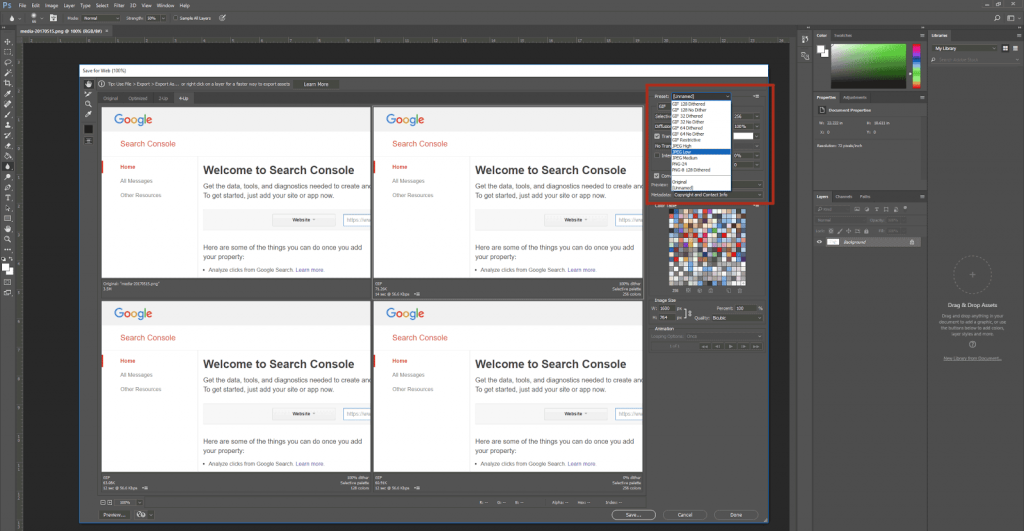
On the right-hand side, Photoshop has a handy set of presets you can choose from, with Jpeg, GIF and PNG file types at different quality levels. Each file type has its pros and cons:
- Jpegs are easy to compress whilst maintaining decent image quality. They are the default image file type online.
- GIFS tend to be bigger in size, and look lower in quality when compressed. It is best used for smaller images, or simpler images like icons or logos. It is also good for animated images.
- PNG is an increasingly popular file option, as it has more colour options than GIF, and tends to maintain quality better with resaves than Jpeg. However, it still tends to be a bigger file size than Jpeg when compressed. As a rule of thumb, PNGs are good for images that have text in them.
This will give you a basic idea of which file type may suit your image best, but it’s always good to try each one out quickly to confirm which looks best in practice. For example, below, we have a text-based image (in point 4) and a photograph – in each case, the best file type differs.
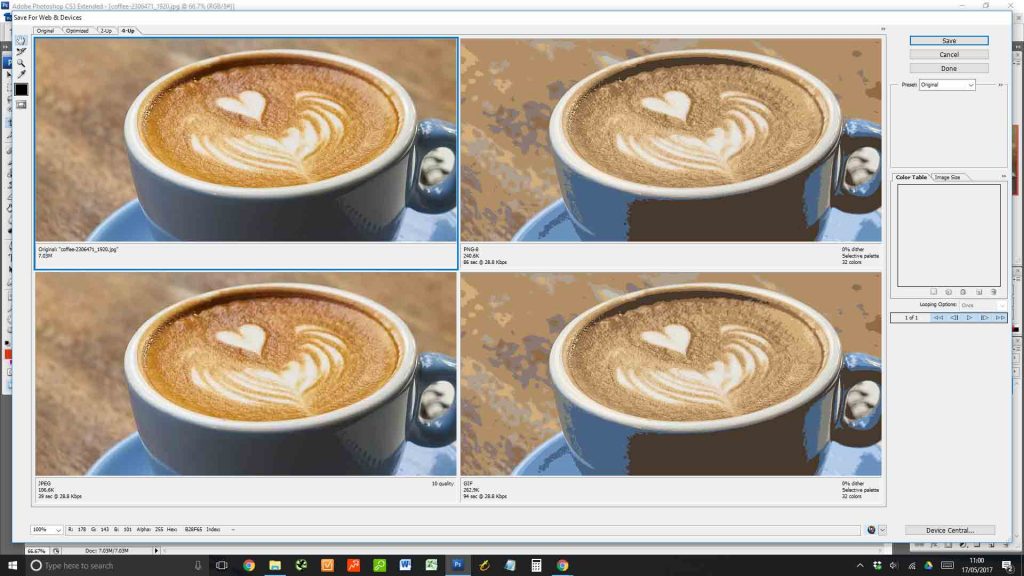
It’s up to you where to find the balance between each, with the file size (listed beneath each picture) and the quality (in the preview box).
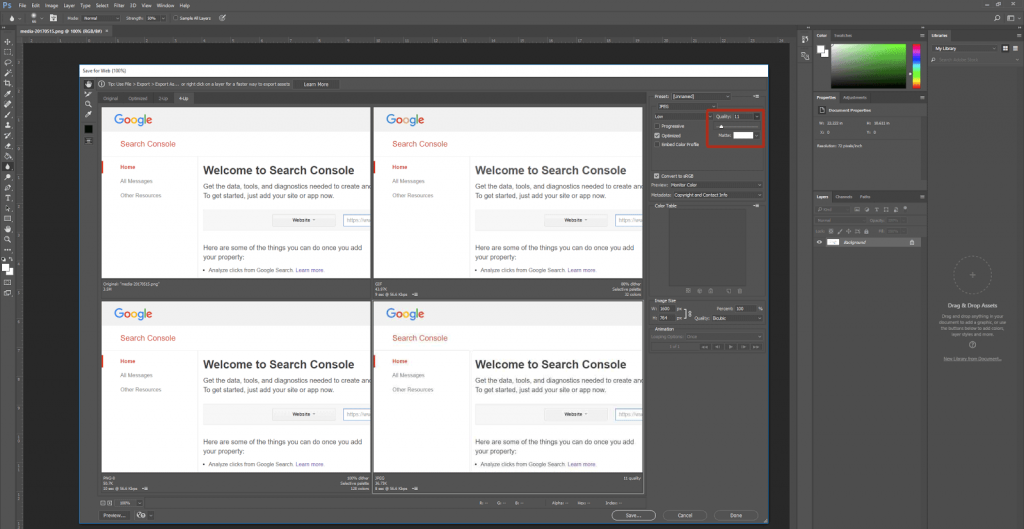
4. Finally, once you have a preset you are happy with (or close to happy with), you can edit it further to suit your needs. If you have a jpeg that is just slightly too low in quality, but a much better compromise than your other files, you can use the ‘quality’ slider on the right to fine-tune. You can fine-tune size with ‘dithering’ for PNGs and GIFs. The good thing about it is that Photoshop makes it easy for you to play around with the settings, so you can also look into the number of colours and diffusion levels too!
5. Once this is all done, just hit the save button at the bottom, and remember to name your file something different to the original so you can tell which one is the optimised version.